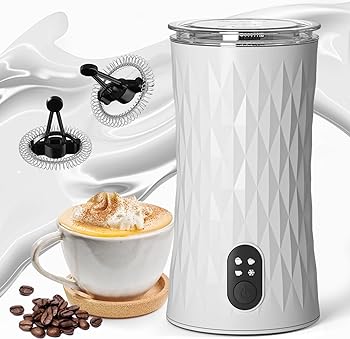
In the world of coffee and specialty beverages, the perfect frothed milk can elevate your drink to a whole new level. A handheld milk frother is a versatile and user-friendly tool that allows you to create creamy, frothy milk for various beverages.
This extensive guide explores the fundamentals of utilizing the Best Milk Frother and Steamer. It encompasses key equipment, appropriate milk varieties, and detailed step-by-step instructions for achieving frothing perfection.
Equipment Overview
Before diving into the frothing process, it’s essential to understand the key components of a handheld milk frother:
-
Handheld Milk Frother:
This compact device typically consists of a motorized whisk or spiral whisk attachment. It’s powered by batteries or electricity and is designed for easy handling.
-
Container:
Choose a suitable container to froth your milk. It should be deep enough to prevent splattering and ideally made of stainless steel or glass.
-
Milk Thermometer:
While not mandatory, a milk thermometer can help you achieve the ideal frothing temperature, usually around 150°F (65°C).
Types of Milk for Frothing
The type of milk you choose can significantly impact the frothing process.
Here are some popular options:
-
Whole Milk:
Offers a rich and creamy froth due to its higher fat content.
-
2% Milk:
Strikes a balance between creaminess and calorie content.
-
Skim Milk:
Produces a lighter froth with fewer calories but may lack the creaminess of higher-fat options.
-
Plant-Based Milk:
Almond, soy, or oat milk can also be frothed, providing dairy-free alternatives with distinct flavors.
Step-by-Step Guide to Frothing
Step 1: Gather Your Equipment
Ensure that your handheld milk frother is clean, and have your chosen milk and frothing container ready.
Step 2: Choose the Right Milk Temperature
Heat your milk to the desired temperature using a microwave or stovetop. Aim for approximately 150°F (65°C) for optimal frothing.
Step 3: Fill the Container
Pour the heated milk into the frothing container, ensuring not to overfill to avoid splattering.
Step 4: Insert the Frother Wand
Turn on the handheld milk frother and immerse the whisk into the milk at a slight angle.
Step 5: Froth the Milk
Move the frother up and down, allowing air to incorporate into the milk. Continue until the desired frothiness is achieved.
Step 6: Swirl and Rest
Gently swirl the frothed milk to incorporate any remaining bubbles. Allow it to rest for a moment to stabilize the froth.
Step 7: Pour and Enjoy
Pour the frothed milk into your coffee or beverage of choice. Admire the velvety texture and savor the enhanced flavor.
Conclusion
Mastering frothing with a handheld milk frother brings barista-quality beverages to your home. Our guide covered essential equipment, milk types, and step-by-step instructions for a flawless frothing experience.
The compact design of the frother and its motorized whisk make it user-friendly for both beginners and enthusiasts. Choosing the right milk, whether whole, 2%, skim, or plant-based, impacts the froth’s texture and flavor.
Our step-by-step guide ensures success, emphasizing milk temperature, immersion, aeration, and post-frothing techniques like swirling. FAQs addressed common queries, enhancing your understanding of frothing, cleaning, and troubleshooting.
In conclusion, the handheld milk frother is a gateway to a personalized beverage experience. Unleash your creativity, experiment with milk types, and savor the creamy delights of expertly frothed drinks at home. Become a home frothing maestro with knowledge and a quality handheld milk frother.
You Might Be Interested In
- How To Froth Milk Without a Frother?
- How To Use A Milk Frother?
- How to Froth Almond Milk
- How To Use Paris Rhone Milk Frother?
- How To Clean Instant Milk Frother?
FAQs
Can I froth cold milk with a handheld milk frother?
Handheld milk frothers are primarily designed for warm milk frothing, as the heat aids in creating a creamy texture. While some models may have a cold frothing option, results can vary. Check your frother’s specifications to determine its compatibility with cold milk frothing.
How do I clean a handheld milk frother?
Cleaning your handheld milk frother is a breeze. Start by detaching the whisk and washing it with warm, soapy water. Wipe the body of the frother with a damp cloth. Avoid immersing the entire unit in water unless specified as waterproof. Regular cleaning ensures optimal performance and longevity.
Why is my froth not creamy enough?
If your froth lacks creaminess, consider a few factors. Firstly, the milk’s fat content plays a crucial role; using low-fat milk may result in less creamy froth. Secondly, ensure proper aeration by fully immersing the frother whisk and experimenting with different frothing techniques. Adjusting these elements can enhance the creaminess of your froth.
Can I use a handheld milk frother for beverages besides coffee?
Absolutely! Handheld milk frothers are versatile tools suitable for various beverages. Beyond coffee, use your frother to create frothy milk for hot chocolate, matcha lattes, or any drink where a velvety texture enhances the overall experience. Explore the possibilities and elevate your favorite beverages.
What’s the lifespan of a handheld milk frother?
The lifespan of a handheld milk frother depends on proper usage and maintenance. With regular cleaning and avoiding submerging the motorized parts in water, a well-cared-for frother can last for several years. Follow the manufacturer’s guidelines for care and maintenance to ensure optimal performance throughout its lifespan.


